BLOGS, ARTICLES, RECIPES, SHOPPING, TIPS AND TRICKS


Redneck Know How Blog

By Donald Matthews
•
June 19, 2022
Will the HYCHIKA cordless screwdriver help me get the screws screwed when my arthritis is acting up? Sometimes it's painful to keep twisting a manual screwdriver and hopefully this is the solution. Come see how things turned out.

By Donald Matthews
•
June 15, 2022
I was asked by Hyper Echo to try out their 20 volt cordless string trimmer and edger and do a review on it it. I did and in this article I will let you know what I found out.
By Donald Matthews
•
June 3, 2022
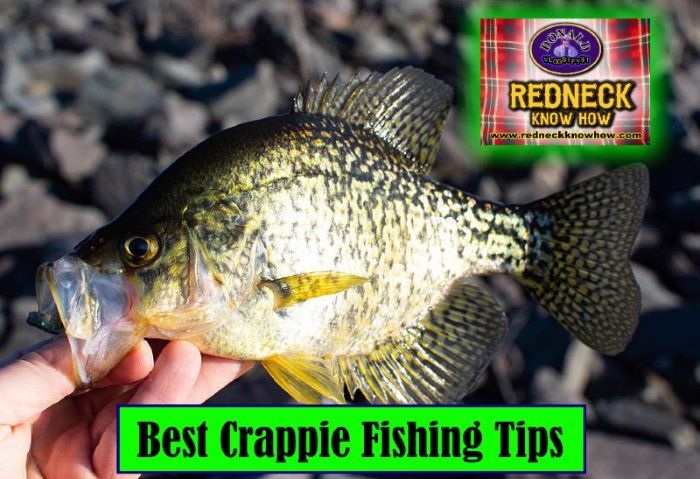
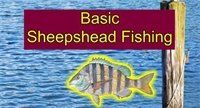
Every fisherman has his or her own favorite techniques to catch this beloved fish. Why is crappie, (or pomoxis, if you want to get scientific), are so beloved? Well, they give one heck of a fight when caught. A 2 lb. crappie can put up a fight to rival a bass of larger size. So catching them is fun. There is also the taste factor. Fried crappie tastes great.
By Donald Matthews
•
June 3, 2022
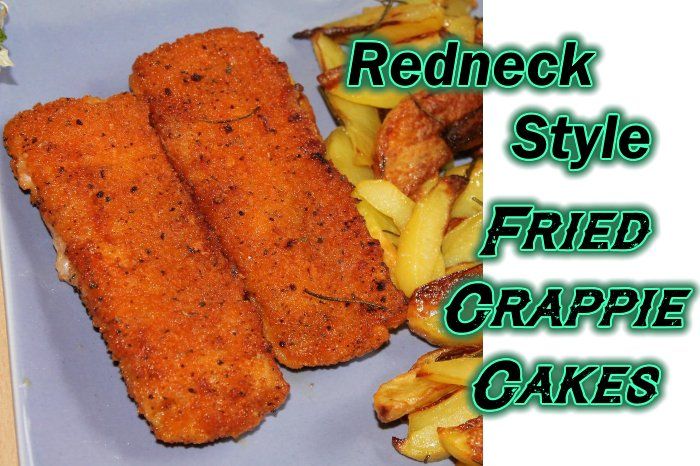
The weather is warm and folks are crappie fishing. Here’s a fried crappie cake recipe that I enjoy. You can eat them plain with some fried taters, or slide them in a bun with some tarter sauce.
Redneck Know How Blog

By Donald Matthews
•
March 28, 2022
I was aske to review the Hychika cordless power drill and I did. I used it to do various things in my home and in my wood shop. This is what I think of it.

By Donald Matthews
•
August 14, 2020
Now it’s time to mark where the mortises for the dominoes will go. The dominoes will serve two purposes. 1) They will help the boards line up and stay lined up during glue up. 2) They will help add more surface area to make the glued up joint stronger. Once I get the edge of the boards marked for the mortises, I’ll make sure they they all line up. Then I’ll start creating the mortises that I marked. First by removing a large amount of the waste with a drill and a Forstner bit, and then follow behind with a chisel to clean up the mortise. Next was the process of gluing the boards together and creating the table top. This is conceptually easy. However, it being a large glue up, gets complicated in practice easily. So what I did was glue up two boards at a time. Letting those boards dry, then gluing those sections up until I finally finished with a full table top. This takes awhile longer than just gluing everything up at one time, but it’s far easier to get two boards to line up, and stay lined up, than five or six at the same time. And of course, there’s the window of time to get things lined up before the glue starts to set to consider. When you’re doing this alone, the glue’s set time sneaks up on you faster than you think. I didn’t have enough clamps long enough to do this glue up and lacked the funds to buy them. Nor could I afford to buy the materials to build pipe clamps. I did find a video in which Izzy Swan made some wedge clamps out of two by fours. And since I had the materials on hand to make them, those are what I made and used. Check out Izzy Swan’s video at this link. https://www.youtube.com/watch?v=wr6MkXy1nos
February 15, 2019
I took a 1x6 pine board and cut it into several equal lengths. Then I glued those pieces together. Which is easier said than it was done. Since the boards slide on the glue so easy when the clamps are applied, I had to glue it in stages. Gluing them two at a time and letting them dry, then gluing those stacks together two at a time and letting them dry. Then gluing the final two together to form one block. I needed two blocks, one larger for the bottom, and one a little wider but not as tall for the top. It took some time. Then I found the center and drilled a hole to accept my chucks worm screw in both blocks. Next I knocked off the corners as best I could with the saw. This makes life a bit safer and easier when turning larger pieces because I don’t have the hard corners to knock down. Plus it keeps the vibration from the spinning wood down.

February 12, 2019
A good friend and customer asked if I could make a keepsake box for him and carve a Celtic cross into the lid. Of course I could. I gave him the options of wood that I had on hand. One of which was an old walnut board that I had acquired. This walnut board is what he chose to have it made out of. Which worked out great because the board was aged and this would help give the finished box an older, aged look. This was going to be a fun and interesting build, so naturally, I decided to record it and make a few videos on my Youtube channel of the build. Content is king, and this Celtic keepsake box would make some great content and allow me to show off how my skills at dovetails has improved. I’ll put the playlist with the videos in it below. I’d be grateful for all views you give me and please feel free to share it if you like it.
June 6, 2018
I’ve been in need of a proper workbench for my woodworking for awhile now. I was without a shop for awhile so making one was a bit pointless at that time. Now that my roommate and I have found this house with a building very suitable to be a shop, the time to build a workbench was long over due. The shop, while not really small, is still limiting when it come to space for woodworking tools. So my bench has to be of a size that gives me room to work on it and still leave room for me to move my Shopsmith Mark 5 around and adjust it as needed for whichever way I need to set it up. I also wanted it to be large enough for me to be able to work on larger projects like tables and other furniture projects. The original plan was for it to be 4 feet by 2 1/2 feet, but that was adjusted a bit as the build proceeded. The final dimensions of the top are 46 1/2 inches by 22 1/2 inches, and the hight of the workbench is 30 7/8 inches. One of the 2x4‘s I was going to glue up into the top twisted to a point that it was just not worth trying to square up. After seeing the size it would be I decided not to add another, and it worked out fine, and the top came out to a good size for what I needed. So on to the how I did it part. how to build a workb...First I took 6 pieces of 8 foot 2x4 SPF and cut them in half. Then I used my hand planes to get the sides of the 2x4‘s I would be laminating flat so they would glue up without any gaps. Then of course there was the glue up. I was limited on clamps so I did this in stages over several days. In fact. I’d plane two boards and glue them up and get them clamped. Then while they dried, I used the wood plane to flatten the next two. The next day I repeated the process and continued until I had 6 pieces of 2x4 glued up. Then I glued up those 6 pieces of SPF, two at a time until got to the final glue up in which I used the wooden wedge clamps I had made awhile back because they are the only clamps I have that were long enough to work. The wedge clamps work as well as any so I don’t feel the need to stress finding the money to replace them with pipe clams or other expensive alternatives. I just have to be sure I use something to keep them form being glued to the project. Being made from wood, they could easily become attached to what I may be gluing at the time.
WHO I AM AND WHAT ARE MY GOALS

Donald Mattews
Redneck!
Hello! My name is Donald Matthews, and I am a redneck! At least that’s what everyone calls me anyway. I’ve been hunting and fishing most of my life and have put a few of the things that I know work here on my website. In recent years I’ve gained a great interest in wood working. That interest has grown especially in the area of pneumatic wood carving. Because I can show you better what I do in video rather than text or pictures; you’ll find that a lot of my articles and posts revolve around videos from my youtube channel which can be found under the name of Donald Vlogsifys Wood Shop. Just click the name and my channel will open in a new window. Please take time to check it out and subscribe while you’re there.
I hope you enjoy Redneck Know How and continue to return. I update it with new content and ideas all the time. Below you’ll find a featured article and a link to the video. There’s also a wild game recipe at the bottom and a link to my other recipes. So kick your shoes off, make yourself at home, and enjoy!
Brought to you in part by
Please visit my sponsors


BassDash Great fishing and hunting wear!
BassDash has great quality fishing, hunting, and casual wear that looks great and fits well. They also have a great selection of lures and other gear for fishing, As well great hunting wear. Don’t forget the thermal underwear this season! From T’Shirts to waders, you’ll find the apparel you need at BassDash.com!
Click here for BassDash.com


Hunting
Redneck Know How Blog

August 26, 2017
Deer can smell you and run if you don't take precautions to get rid of the human scent. These are some great scent control products that will help you keep your human scent down and your bag limit up!...
By Web DevObal
•
January 24, 2016
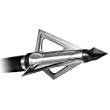
Fixed Blade Broadheads for bow hunting!

Fishing
Redneck Know How Blog
By Donald Matthews
•
June 3, 2022
Every fisherman has his or her own favorite techniques to catch this beloved fish. Why is crappie, (or pomoxis, if you want to get scientific), are so beloved? Well, they give one heck of a fight when caught. A 2 lb. crappie can put up a fight to rival a bass of larger size. So catching them is fun. There is also the taste factor. Fried crappie tastes great.
January 8, 2016
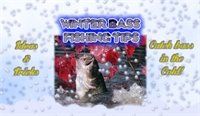
That nip in the air doesn’t mean you have to put up all your fishing gear and give up on catching a winter bass. All cold water means is you have to change your fishing tactics to adjust to the changed habits of the largemouth bass. Here are a few tips for catching those winter fish. Bass are more lethargic during winter months, but they are far from being a creature that hibernates, so they must feed to live. And any fish that feeds can be caught with the right bait and the right combination of tactics for the lure. Lures with thin metal blades can work wonders on a trophy winter bass. Use them for ledge hopping, walking down points, and along channel edges. Try jiggling slab spoons right in the face of slow to strike fish.
September 13, 2015
Click here for the rigs you need for fishing the fall spot run! Eagle Claw Pier and Jetty Ready To Fish Tackle Kit
Wild Game Recipes
Redneck Know How Blog
By Donald Matthews
•
June 3, 2022
The weather is warm and folks are crappie fishing. Here’s a fried crappie cake recipe that I enjoy. You can eat them plain with some fried taters, or slide them in a bun with some tarter sauce.

May 1, 2016
This species of bream are easy to catch and very plentiful. This makes them perfect for this recipe. This is also a versitale bream recipe as you can also use bluegill bream. If you’ve been looking for different bream recipes, this is one you’ll love. Shellcracker and jalapeno appetizers will delight everyone.

January 3, 2016
The wonderful taste of the venison round steak can be enhanced by tenderizing it the night before you cook it and marinating (soaking) it in buttermilk. Just crush 2 to 3 cloves, add that to the buttermilk a long with ½ tablespoon of Cavender All Purpose Greek Seasoning Stir to mix. Then add the venison round steak making sure all the meat is submerged in the buttermilk mixture. Cover and place in the fridge overnight. Then prepare as the recipe that follows. For more information about soaking wild game, please read my article, Wild Game Meat Soaking.

August 2, 2015
Tents, Backpacks, Sleeping Bags & More! CampingMaxx has the gear you need for your next outdoor adventure!
Hunting
Redneck Know How Blog
August 26, 2017
Deer can smell you and run if you don't take precautions to get rid of the human scent. These are some great scent control products that will help you keep your human scent down and your bag limit up!...
By Web DevObal
•
January 24, 2016
Fixed Blade Broadheads for bow hunting!

By Web DevObal
•
June 7, 2015
With the exception of those hunters that nailed some 2x4's to a tree and added a pallet to make a tree stand or used some other self-made platform. Still Hunting know-how was a must. And that's the way you had to hunt before the advent of screw in steps, climbing deer stands, and other such products came along and changed deer hunting forever. Sometimes I like to get back to basics though. Maybe I'm getting old, but sometimes I just don't feel like dragging that bulky deer stand into the woods to deer hunt. And they take away the pleasure of just walking through the woods. Plus my knees have never been the best for climbing into deer stands to begin with. And while tree stands are effective, deer stands are not a sure bet for producing deer kills, and often can be counterproductive for bow hunting. There are a lot of areas where working a climbing deer stand or other such tree stands and remaining un-noticed by the deer is near impossible. So what's left? How can you hunt deer without a stand and not run dogs? The answer is still hunting from the ground. This is when we need to get back to basics and hunt like our fathers and grandfathers did. On foot. It can be done, or we likely wouldn't be here to carry on the hunting traditions of our forefathers as many of them would have starved out long ago. You have to be quit and even more aware of your sent and which way the wind is carrying it. But many a deer have been taken by this method of deer hunting. First, you'll need to think of protection from the insects while still hunting. You'll be standing still and not moving for periods of time, swatting mosquitos and flies, and picking ticks off of yourself can be very annoying and counterproductive to a deer hunter. Luckily we have products to reduce if not eliminate this problem that the old timers didn't have. You'll want to spray your clothing with Permethrin Spray Tick Repellent . This product is odorless, and bonds to the fabric retaining it's effectiveness through several washings. Then there is your scent that you must minimize. And even more important when still hunting on the ground than it is when hunting from a tree stand. There are several products for this such as the Scent-A-Way MAX Fresh Earth Scent Control Kit by Hunter's Specialties . But you will never completely eliminate the human scent. So when you're Still Hunting from the ground, make sure to stay downwind from the deer. And never cross any trails that the deer are using on your way to your natural blind. Avoid getting attracting scents on your feet. This will lead the deer right to you. The deer are too alert when following these scent trails and will spot the slightest movement you make. So as soon as you start drawing back to take a shot, it's likely the deer will spot you and take off before you get to half draw. Avoid using deer attractants near your blind for the same reason. Now you'll need to conceal yourself and defeat the deer's vision. This can be another difficult task while Still-Hunting on the ground. Deer are likely to spot a broken tree branch that was not broken before and bolt far out of bow range. You should avoid making any fast movements. Simply turning your head can alert a deer to your presence. It's a good idea to avoid caffeine for a day or so before you ground hunt as any nervous impatient movements will cost you a deer. A turkey hunter can easily tell you how still you have to be. A person that can't stay still for hours on end may want to think about a fabric blind instead of trying to hide yourself in the brush around you while Still Hunting on the ground. But these have draw backs. I find them much less effective than using natural surrounding cover. The fabric may shine and flap in the wind, and the poles often make un-natural noises. So it is necessary to set these blinds up before you Still Hunt on the ground several weeks before hunting them. The deer will have to get use to them and accept them as part of their environment. Some other tips for Still Hunting on the ground are to make sure you cover your face with a camo net as well as cover your hands with camo as well as your body. A pocket sized pruning sheer will come in handy for making a ground blind from the natural cover in some circumstances. And wait to draw your bow when the deer are looking the other way. I hope these tips help you have a successful experience Still-Hunting on the ground. And please visit my sponsors, all of which carry great products to make your hunt better.
Fishing
Redneck Know How Blog
By Donald Matthews
•
June 3, 2022
Every fisherman has his or her own favorite techniques to catch this beloved fish. Why is crappie, (or pomoxis, if you want to get scientific), are so beloved? Well, they give one heck of a fight when caught. A 2 lb. crappie can put up a fight to rival a bass of larger size. So catching them is fun. There is also the taste factor. Fried crappie tastes great.
January 8, 2016
That nip in the air doesn’t mean you have to put up all your fishing gear and give up on catching a winter bass. All cold water means is you have to change your fishing tactics to adjust to the changed habits of the largemouth bass. Here are a few tips for catching those winter fish. Bass are more lethargic during winter months, but they are far from being a creature that hibernates, so they must feed to live. And any fish that feeds can be caught with the right bait and the right combination of tactics for the lure. Lures with thin metal blades can work wonders on a trophy winter bass. Use them for ledge hopping, walking down points, and along channel edges. Try jiggling slab spoons right in the face of slow to strike fish.
September 13, 2015
Click here for the rigs you need for fishing the fall spot run! Eagle Claw Pier and Jetty Ready To Fish Tackle Kit
June 8, 2015
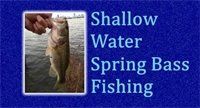
Pre-Spawn As the water temperature warms to the mid 50's as spring comes on, a lot of bass are still in the deep water. But a lot of the more aggressive fish are likely to be chasing bait in the shallows. When the bass hit the shallow water early like this, they are in search of warmer water and this means they have a higher metabolism. If the shallow water is clear, try suspending a finesse jig or jerkbait just over the bottom. Also try to wind a flat-sided crankbait around any cover that might be in the shallow water. It's best to use a shad colored crankbait until water temperatures reach 60 degrees, then switch to crankbaits that imitate crawfish. However, if the water is stained, spinnerbaits are a better option for open water, or for cover that is isolated. Use a jig for heavier cover. If the lake or pond has aquatic vegetation, try to concentrate on that first. Big bass love hydrilla because it draws in more bait fish due to it's oxygen producing properties. Hydrilla with the brightest green growth really seems to be an important factor in attracting bait fish and where there's bait fish, there's big bass. Look for rock cover as well. Rocks retain heat and aid in warming the water which attracts those bass with the high metabolism. Then try finding the wood cover during pre-spawn. As water temperatures warm into the 60's, largemouth bass hang in the shallows longer. This water temperature affect how the bass react to weather fronts coming in and out. As long as the shallow water stays in the mid to lower 60's, the largemouth bass will not move out of the shallow waters as they will in colder water temperatures. They will stay in the shallow water. A prime time to fish combinations of wood and grass cover is when bass move in seeking spawning areas and the water temperatures are in the 60's. Fish the grass first then wooden cover instead of rock covers. Don't neglect the rocks, but hit them only after the hydrilla patches and wood cover. You may find you'll be catching a lot of 2 to 3 pound male bass, but the larger females can be found around prime cover right outside of the spawning areas. So fish prime cover such as blowdowns or a dock that is near the spawning areas. If the water temperature is in the 60's but the bass in the shallow water don't seem to want to chase what you throw at them, try plastics. Otherwise, try a jerkbait in clear water or a spinnerbait if the water is stained. If the water is really stained bad you may want to try a spinnerbait with a Number 4 or number 5 Colorado blade so that you can get plenty of vibration. Spawn The full moon can have a big effect on the largemouth bass that are spawning as long as the weather is stable. But when weather is in consistent and sporadic, bass will spawn on the warming trend no matter what the phase the moon is in. So when the surface temp is in the upper 60's, the largemouth bass are spawning. A good bait to use during this time is Berkley Power Bait Power Hawg Bait 4-Inch. Try a black and blue combination when the water is dirty; grass or pumpkin green in clear water. The depth you fish should also depend on the clarity of the water. If the water is stained, bass will spawn in 4 feet or less. if the water is clear largemouth will spawn in water up to 8 feet. You should adjust your fishing as the water clarity changes. You can catch a large number of bass this time of year, but if you're out for the challenge of finding the hawgs you'll need to fish the edges of the spawning areas along the prime cover. the smaller bass will be scattered along the bank and in the various cover. But the big bass will be in heavier, darker cover and closer to the deep water. Smaller fish are just not a picky about the cover they use, but the big bass are much more choosy. For the big female bass that get into the heavy cover, your best bet is a flippin' stick. From time to time a spinnerbait or crankbait will bring a short strike from a spawning bass. If you do get a short strike on one of these baits, follow up immediately with a soft plastic lure. Post-Spawn After the spawn comes the post spawn and the beginning of topwater season. Topwater lures are effective during this time because male bass are protecting fry and the topwater lures are offensive to these male bass. And the big females who have finished spawning are still lurking in the shallow water and respond well to large top water lures. During this time, big lures catch big fish. Buzzbaits and stickbaits such as the Zara Spook work well during this phase. Floating jerkbaits, large double willow-leaf spinnerbaits, and full size jigs work well to catch big bass during this period also. Soon after the largemouth bass have spawned, many will return to the deeper water. But several fish will stick in the shallow water as long as there is abundant shade. Use your flippin' stick and a jig around thick trees and along and under docks. Try flipping in the thickest and nastiest stuff that other anglers won't touch. Get that jig as far back in the nastiest stuff as you can and you might be surprised at the big bass you catch.
Wild Game Recipes
Redneck Know How Blog
By Donald Matthews
•
June 3, 2022
The weather is warm and folks are crappie fishing. Here’s a fried crappie cake recipe that I enjoy. You can eat them plain with some fried taters, or slide them in a bun with some tarter sauce.
May 1, 2016
This species of bream are easy to catch and very plentiful. This makes them perfect for this recipe. This is also a versitale bream recipe as you can also use bluegill bream. If you’ve been looking for different bream recipes, this is one you’ll love. Shellcracker and jalapeno appetizers will delight everyone.
January 3, 2016
The wonderful taste of the venison round steak can be enhanced by tenderizing it the night before you cook it and marinating (soaking) it in buttermilk. Just crush 2 to 3 cloves, add that to the buttermilk a long with ½ tablespoon of Cavender All Purpose Greek Seasoning Stir to mix. Then add the venison round steak making sure all the meat is submerged in the buttermilk mixture. Cover and place in the fridge overnight. Then prepare as the recipe that follows. For more information about soaking wild game, please read my article, Wild Game Meat Soaking.
August 2, 2015
Tents, Backpacks, Sleeping Bags & More! CampingMaxx has the gear you need for your next outdoor adventure!

June 8, 2015
Part One: Lemon/Butte r Sauce In sauce pan place the following: 1 pound of real butter 1 medium onion diced 3 to 6 cloves of crushed garlic creole seasoning or salt and pepper to taste Tabasco sauce to taste (six to eight drops minimum) -Do not omit the Tobasco 1 tablespoon of Lea & Perrins Worcestershire sauce Juice of 3 lemons Place over low heat and let simmer for 30 minutes, stir occasionally. Part two: Stuffing In a large mixing bowl place the following: 2 Bell Peppers diced 4 stalks of celery chopped 3 cans of small cocktail shrimp drained 3 cans of lump crab meat (do not use imitation) Tabasco brand red sauce( 6 to eight drops minimum) 1 tablespoon Lea & Perrins Salt & Pepper Very easy on the salt 3 cloves of crushed garlic 1 large onion diced 2 cups bread crumbs Add approximately half the lemon butter mix created above and combine until uniform. Thin slice 1 lemon and 1 onion Clean the fish well (the head may be left on if you wish for presentation) On a double thickness of heavy duty aluminum foil place half the lemon and onion slices. Place the fish on top, stuff the body cavity with the mix, put the rest of the lemon and onion on top the fish. Pour on the remaining lemon butter sauce then close the foil to seal. Place on grill, cook with lid closed for about 10 to 15 minutes per side. Slit foil for last few minutes to add a little smoke flavor. Test doneness with fork. Meat should remain slightly firm but flake easily. This recipe can be shared among individually wrapped smaller fish if you wish. Serve the Stuffed and Grilled Red Snapper with home fries or grilled corn on the cob and enjoy!


Redneck Know How Blog
February 12, 2019
A good friend and customer asked if I could make a keepsake box for him and carve a Celtic cross into the lid. Of course I could. I gave him the options of wood that I had on hand. One of which was an old walnut board that I had acquired. This walnut board is what he chose to have it made out of. Which worked out great because the board was aged and this would help give the finished box an older, aged look. This was going to be a fun and interesting build, so naturally, I decided to record it and make a few videos on my Youtube channel of the build. Content is king, and this Celtic keepsake box would make some great content and allow me to show off how my skills at dovetails has improved. I’ll put the playlist with the videos in it below. I’d be grateful for all views you give me and please feel free to share it if you like it.
July 25, 2015
The final part to this picnic table project. I finish the roof top, stain, and add a distressed painted look to it. I took the basic design from a video that Jay Bates made and added my own touches to make what my brother in law was asking for. The video for the ones Jay Bates made is here https://www.youtube.com/watch?v=qCzmI.... Please check his channel out and subscribe, he has loads of good videos for projects and lots of great ideas! Please Check out Jay Bates channel https://www.youtube.com/channel/UC-7X... Please visit the OFFICIAL Website of Donald Vlogsifys!! http://redneckknowhow.com/ Donald Vlogsify's Wood Shop on youtube. https://www.youtube.com/channel/UCBIE... Please visit my vlog channel for my goofy stuff. https://www.youtube.com/user/donaldvl... Blogger http://donaldvlogsifys.blogspot.com/ Live Journal http://donald-vlogsify.livejournal.com/ Wordpress blog https://donaldvlogsifys.wordpress.com/ Please like me on FaceBook. https://www.facebook.com/donaldwoodshop Follow me on Twitter @redneckknowhow https://twitter.com/redneckknowhow
July 21, 2015
In this one we do assembly of the picnic table and start preparing for to add a roof. I took the basic design from a video that Jay Bates made and added my own touches to make what my brother in law was asking for. The video for the ones Jay Bates made is here https://www.youtube.com/watch?v=qCzmI.... Please check his channel out and subscribe, he has loads of good videos for projects and lots of great ideas! Please Check out Jay Bates channel https://www.youtube.com/channel/UC-7X... Please visit the OFFICIAL Website of Donald Vlogsifys!! http://redneckknowhow.com/ Donald Vlogsify's Wood Shop on youtube. https://www.youtube.com/channel/UCBIE... Please visit my vlog channel for my goofy stuff. https://www.youtube.com/user/donaldvl... Blogger http://donaldvlogsifys.blogspot.com/ Live Journal http://donald-vlogsify.livejournal.com/ Wordpress blog https://donaldvlogsifys.wordpress.com/ Please like me on FaceBook. https://www.facebook.com/donaldwoodshop Follow me on Twitter @redneckknowhow https://twitter.com/redneckknowhow
July 14, 2015
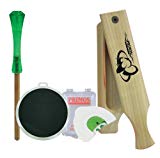
The final part of making the dice board and cup. Please visit the OFFICIAL Website of Donald Vlogsifys!! http://redneckknowhow.com/ Donald Vlogsify's Wood Shop on youtube. https://www.youtube.com/channel/UCBIE... Please visit my vlog channel for my goofy stuff. https://www.youtube.com/user/donaldvl... Blogger http://donaldvlogsifys.blogspot.com/ Live Journal http://donald-vlogsify.livejournal.com/ Wordpress blog https://donaldvlogsifys.wordpress.com/ Please like me on FaceBook. https://www.facebook.com/donaldwoodshop Follow me on Twitter @redneckknowhow https://twitter.com/redneckknowhow