Building a Workbench With a Door
July 28, 2017
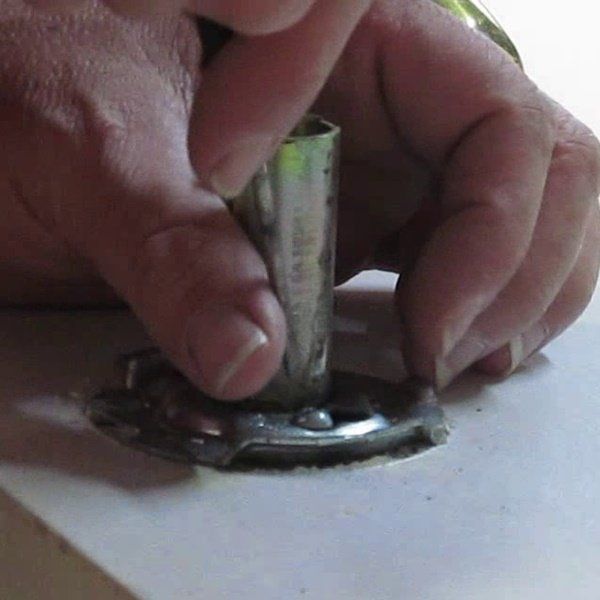
The first thing I did was remove the doorknob and hinges. The doorknob had hidden screws and I’d never removed one like that before. I had to go watch a youtube video to figure out how to get it off. But it was an easy job once I knew what to do. The hinges came off easy. That was a pretty straight forward job, just remove the screws and pull off the hinges. This prepared the door for being the workbench top as well as gave me a temporary surface to work on.
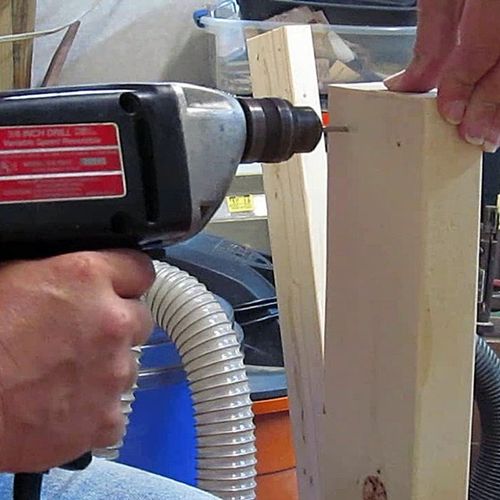
Next I pre-drilled some pilot holes in one end of the 2x4 legs and started the screws. Then I Putting the workbench leg components together.lined up the center two by four and screwed the two by four legs onto the center 2x4. I cut the legs to 38 inches which was the height of our kitchen counters which are a good height and I like. However, I didn’t take into account what I would be using on this bench. A router table and bench top drill press. The drill press is alright, but the router table is a bit high. Still usable but I will have to figure something else out eventually. I wish I had made the height of the bench about 6 inches shorter though.

I made three of these leg components for the workbench. And this leads to the next step which is adding the two by four brace across the top of the legs. First I drilled pilot holes in the top of the leg components and started the screws. Next I clamped the brace in place on the inside of the legs and began running in the screws. Constantly checking to make sure everything was flush until everything was tight and in place.
I added some braces about halfway down the legs on each end. I made these braces out ofAdding side braces to the workbench. some scrap 1x 6 that I had. Eventually, if needed I can add one to the center set of legs and lay a piece of plywood or boards across them to make a shelf. But for the time being, my shop vac and cyclone dust collection fits under there near perfectly and keeps them out from under foot and taking up valuable space on the shop floor.


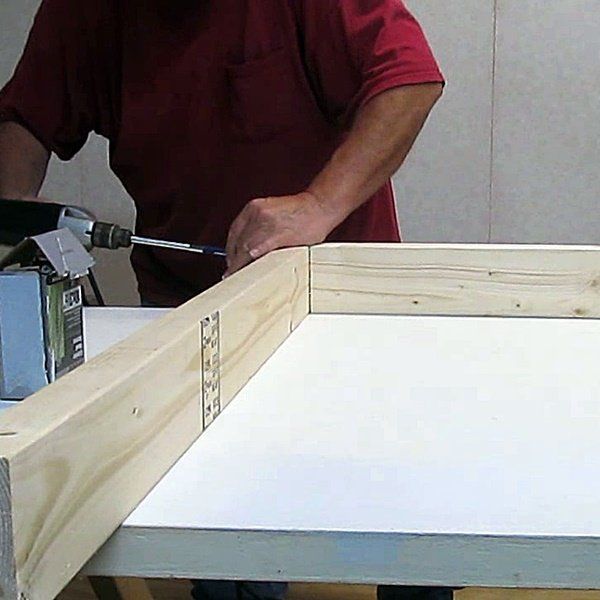
All that’s left is to lay the door across the top and the biggest part of Placing the workbench top.building a workbench for my shop is done. I will have to come back and do some tweeking. The door slides a little, so I’m going to have to make some braces to hold it in place. I don’t want to damage the door too much so I’ll have to make these braces with that in mind. Another regret on this build is I didn’t build the workbench base so that the legs would be flush with the door top. If I had I could have just cut some 1x2 boards to length and screwed them into the 2x4 legs with the end extending to be flush with the top of the bench. As it turns out I’ll have to notch out some pieces of two by four.
However these braces will be a project and article for a little later on. If you decide to do this, I do suggest you run another two by four brace across the back. Also remember to measure for what you need and not use any of the measurements I mentioned as your needs are likely different than mine. If you haven’t already, please check out my YouTube channel. I usually release my project videos there before they ever make it to this website so please subscribe while you’re there. Have a lovely day; Get out there and do some woodworking; have a great night and a happy life because life is short and it’s meant to be enjoyed. Peace!!
Redneck Know How Blog

Will the HYCHIKA cordless screwdriver help me get the screws screwed when my arthritis is acting up? Sometimes it's painful to keep twisting a manual screwdriver and hopefully this is the solution. Come see how things turned out.

I was asked by Hyper Echo to try out their 20 volt cordless string trimmer and edger and do a review on it it. I did and in this article I will let you know what I found out.

Every fisherman has his or her own favorite techniques to catch this beloved fish. Why is crappie, (or pomoxis, if you want to get scientific), are so beloved? Well, they give one heck of a fight when caught. A 2 lb. crappie can put up a fight to rival a bass of larger size. So catching them is fun. There is also the taste factor. Fried crappie tastes great.

The weather is warm and folks are crappie fishing. Here’s a fried crappie cake recipe that I enjoy. You can eat them plain with some fried taters, or slide them in a bun with some tarter sauce.
I was asked to review the .SORAKO 800-3000SPM Jigsaw And after the pleasant experience with the SORAKO chainsaw, I was happy to give their jigsaw a try. Come find out what the results were.

I was given the opportunity by HYCHIKA to try out and review their SORAKO chainsaw. This blog describes what I think about the chainsaw. How well I like it as well as my experience in using it.

I was aske to review the Hychika cordless power drill and I did. I used it to do various things in my home and in my wood shop. This is what I think of it.
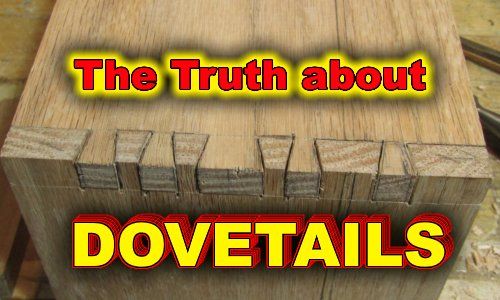
Everybody seems to be in love with dovetails these days. Myself included. They look nice, feel nice, and they make the woodworker feel an overwhelming since of pride when he makes tight and even. Especially the hand cut dovetails. Dovetail joints can be produced with power tools. And there are dovetail jigs you can buy and make. It makes getting precise dovetails with no gaps a lot easier. But nothing feels more satisfying than finally getting hand cut dovetails tight and gap free. And for the record, I use the term, “gap free”, very loosely. I’d wager that even the best woodworker gets gaps in their dovetails no matter how hard they try. Maybe not as many as us new to middlin’ woodworkers, and certainly not as noticeable, but there are gaps in their dovetails. Nowadays, people use dovetails not only as a joint, but as decoration. A showpiece if you will to show off the craftsmanship of the woodworker. But the reality is that they were not originally meant to be pretty. They were utilized to hold pieces that were heavily used together. Such as drawers or other parts of furniture and other items that were constantly pulled or tugged on. In the example below, you can see how the angles of the dovetails will keep the joint from coming apart during the tugging of the drawer when opening it. This part of the joint is where the dovetail joint get’s it’s name. Often when used on boxes, the orientation of those angles are switched around, placing them on the front of the box as a decoration, and the pins of the joint is put on the side. Great for looks, not so great for function. Of course for most smaller boxes, the function of the dovetail really isn’t needed and using dovetails for looks is fine and an anesthetically pleasing way to show off craftsmanship. But let’s not give up on using the dovetail joint for utilitarian purposes when building boxes too quickly. They can be a great way to join a bottom to a box that will be holding heavier stuff, such as tool boxes. The angle of the dovetails can manage the stresses of carrying heavier items such as tools if you wish to maintain a *NO screws or nails* policy on your woodworking projects. Or you can use the dovetail joint along with screws for extra protection against the bottom dropping out. So the purpose of the dovetail is a lot more than to just make your woodworking look good. In fact, long ago, they were hidden. Simply a way to join parts and give them the strength to do what the item was meant to do, and be hidden when the drawer was closed. Using the dovetail joint for decoration is a modern thing. Which I have nothing against. I love to show off dovetails I’ve made nearly perfect. Well, in my eyes anyway. Roy Underhill and Paul Sellers would likely just look at them and grin, maybe chuckle at me being so proud of something so far from the skill level they have achieved.

My wonderful experience with Starbond Super glue is explained in this blog post. The absolute best CA glue I've used.

An option for dealing with nail holes and voids in a table top made with pallet wood.